Monday, January 31, 2022

More CNC fun

We have panels!!!  At the end of the day it all went pretty good - mostly.  I got in the shop tonight, loaded up the first panel, loaded the program, and carved away.  A couple of learnings from tonight.  

1.  Just because the feed chart *says* you can run at 'x' inches/minute doesn't mean you _have_ to run there.  A little slower is an advantage, particularly on smaller tools.  Yep, snapped a mill.

2.  Dealing with warped plywood makes having a partner who can act as a dynamic clamp a real help.  

I'm sure I will have to refine this joint a bit, but for right now - it's zero clearance between the hatch and the back end.


Next up - epoxy on the trailer floor (underside, and maybe some bedliner? (suggestions welcome).  

CNC time

 After more than a little frustration with FreeCAD over the weekend, I was finally able to pin my woes down to a couple of things:  

  1. My drawing had a defect that was not noticeable until you tried to to run the CNC.
  2. FreeCAD didn't handle the Tag dressup very well.  This may be a bug, or yet another artifact of #3 
  3. I still don't know what I'm doing.
The latter is definitely an issue - generally, I suggest people pick something small and simple when learning new technology - like "Hello World".  Not me - I dove in and started with a complex layout that wouldn't fit on a single sheet of plywood, which necessitated splitting up the drawing in ways that are not normally done.  "That's not generally something I'd contemplate" - advice from someone who is supposed to be a CAD guru...

And at the end of the day, I generated sawdust.  You can see the outline on the right - that's the top of the side panel at the rear hatch.  Wait... why does it drop 1" at the end of the curve?? (It shouldn't).  

Fortunately, or irrelevantly, it didn't matter.  Somehow the depth was incorrect, so it only cut the first layer of veneer.  (never commit gcode on a Saturdayy night at 2300 after working on the problem for 12 hours.  I really, really should know better...)

So back to the debug tree, and I *still* don't know why it thinks one of the panels is .4 inches tall, but I learned how to enforce the boundaries, and it's now all on the correct plane - and Yep, I read the gcode itself to verify that!

Off to the shop now to try again.  Hopefully the next post is a set of panels instead of more expensive sawdust!!!


Saturday, January 29, 2022

Weekend update - purchasing and software woes (and successes!)

I spent yesterday afternoon picking up a half dozen Baltic Birch 4x8s from Forest Products.  All good, easy transaction, in and out the door and on my way back home in less than 10 minutes.  I'd planned to spend the evening finishing up the CAD/CAM prep to maybe - just maybe try and CNC a panel this morning.  By 11:00 last night, I'd thrown up my hands in disgust.  I was starting to think that not only was I in over my head, I might be so far down the rabbit hole that the only way out was to back out and start over.  FreeCAD is a wonderful program, but it's got some idiosyncrasies that will drive you to drink.  Look up "Topological Naming Problem" for a glimpse.  There is however, a solution - but it does take pretty much starting fresh.  A branch copy of FreeCAD -that will probably get consumed back into the main product (it's that much better) not only fixes the naming issue, but injects a fair amount of common sense into some of the design elements as well. OK, I could go on for hours about how I stumbled thru the problems, learning the new branch, and watching a metric c___ton of youtube videos to make sense of things I encountered.  Short answer, there was beer involved.

At the end of the day though, I took this:


And turned it into this:
(it's a lot more fun to look at the layout than at the gcode that's really the output)

I greatly underestimated the 'beauty' of turning a 5x10 panel sketch into 4 pieces that could be swiveled around and fit on 3 sheets of plywood.  But it's done now, and tomorrow I'll switch to actually trying to cut the panel on the CNC - or I'll generate sixty bucks worth of sawdust - one of the two, I'm sure!!!
****************************


Thursday, January 27, 2022

Such a boring shot...

 Between my day job and 10 below, I haven't been able to get the floor panel home.  I've finished several small projects like end plugs, and made some cheezy blocks and tie-downs for transporting panels in the utility trailer.  And yes, that tie-down is asymmetrical.  I guesssed wrong on the amount of filament on the spool and it ran out about 20 layers short of a full print.  


But the better news is that I got the floor home, it's in good shape, and it's ready to sand, epoxy the bottom, and start attaching things like walls.  
And that will be my next post.  I've been struggling with the walls - learning that FreeCAD doesn't have the most intuitive facilities to split drawings, and then realizing that I really can't just 'split' it anyway - I need to plan on how to cut it, extrude the sketch, then prep the CAM job, and so on.  Comically painful for a boomer who learned drafting in high school with t-square and triangle...

In any case, the wheels will go on this weekend, I'll take my first real shot at turning expensive plywood into sawdust, and if it warms up a little, touch up the bottom with the sander and get some penetrating epoxy on the bottom.  Couple of coats ought to do it, don't you think?


Wednesday, January 19, 2022

Floor construction - complete

Milestone today.  I get to check off the floor construction step.  Now to get it home, drilled for the hold downs, and then some undercoat on the bottom and finish varnish on the top.  Here's the last 4 inches of the bottom.  Flipped it over and did the top as well.  


 The next week will be cleanups, finish cabling, finish work on the bottom of the floor, and a lot of refinement on the wall panel drawings.  If everything goes well, I'll CNC panels in about 10 days.

Tuesday, January 18, 2022

Worlds collide

 I've had this 3D printing habit for the past 22 months, and unlike a lot of people who spend their time designing and printing incredible fantasy miniatures, COSPlay helmets and other fun stuff, mine have mostly printed larger partsd - masks, bits for equipment, bike parts, and  oddball functional bits.

One item for the trailer build is end caps for the frame tubes.  The *last* thing I want is a mouse/squirell doing to my trailer wiring what the little terrorists did to my ABS (1200 bucks to find and repair the short, thank you very much...)   Also, who needs to provide a crash pad for a bunch of wasps???

I prototyped this a few weeks back, and tonight printed the first one to check tightness.  These are printed in TPU - a somewhat flexible material.  I'll print additional versions with an angled entry to feed the wire  bundle forward to the 'black box'.  

And a small plug for Swampwerks - these are available for sale, customized to your application.  DM me for more info.

Monday, January 17, 2022

Ground Up, Part II

 Another scramble today.  I got to Menards (local big box hardware) about 7:00 to pick up glue and insulation. Definitely buy glue in bulk - Titebond II.  I think a gallon will be a good start.  Since I wound up with a 3/4¨ cavity, and nobody locally stocks 3/4¨ anything, I wound up using 1/4¨ accordion foam.  Kind of a pain in the backside cutting 3 sheets for every cavity, but it worked. Once that was down, it was a matter of pouring on the glue, using a 2¨ chip brush to spread it, and then getting the 5x5x3/8¨ top cover popped on.   To make sure the panels align, I dry fit the panels, clamped down one half, and then pulled the other half on top of the clamped panel.  Then I poured a goodly amount of glue, using a 2¨ chip brush to spread it, and then quickly slid the 5x5x3/8¨ top cover in place.  Starting from the inside edge of the panel, I stapled more or less counterclockwise until I had the enitre panel down.   Once that was done, it's just a matter of 'rinse and repeat' to get the other side in place.  

Now it's standing on end, waiting for me to get out the router and trim up the edges.  One take-away from building the Skoota launch was not to get too hung up on perfect edges.  It's much easier to run the panel router around the perimeter and clean it up.

Tasks remaining on the floor.  

  • Router the edges
  • Seal the bottom with epoxy
  • Fill in all the staples on the top and sand the whole top. 
  • Mount to trailer (temporary)
As an added 'bonus' this morning, I got a call from the siding company delivery guy to let me know he'd dropped my aluminum skins!  Of course he set them against the garage door, so I couldn't get in to get a panel jack until I moved 3 very ungainly (and quite noisy) panels of aluminum.  BTW, a 5x10x .063 sheet of aluminum is pretty awkward to move!

Sunday, January 16, 2022

Building from the ground up

 The frame is done, the wiring is [almost] done, the suspension is, well, it's getting there...

Next up is the floor.  I went shopping earlier in the week for dimensional lumber, and yesterday for plywood.  My goal for the day was to get the frame put together, and the bottom glued on.  

First up on the agenda was to take this seeming random pile of sticks and turn them into something useful - like a skeleton.  I started out with the long rails, which were both slightly long (thank goodness - neither end of either board were actually square.  I also quickly realized that while _generally speaking_, ¨5/4¨ should mean that the board is actually that - 1.25¨ thick.  Not so fast, there fella.  It means what it means to the yard you buy the wood from.  In my case, 5/4 is S4S - sanded both sides, and is really right around 1¨.  But not all of them were the same, so a change in design, and 1 inch insulation just became 3/4.  No big deal - hadn't gotten that yet, and I don't think it's truly going to make a bit of difference.  Anyway, off to the planer for some squaring and flattening.  Next, careful measurement and calculation to determine the exact length of the laterals, set a stop on the miter saw, and cut all the laterals to length - again after squaring off one end.
Next, pocket hole everything.  My newest, funnest toy!  This is about as stupid simple as can be.  Set it up, clamp it on, drill it out.  
Once they were all drilled, it was just a matter of picking a time when I could occupy 2 workbenches in the shop for a couple of hours.  Yep, Saturday evening.  
It took a while to line everything up, clamp it, jig it square (within 1/16th corner to corner.  And then glue it, re-clamp it, drive in those pocket hole screws, and make sure it was still square.
The one screwup I made was in spacing the laterals.  I missed the one at 60 inches.  So at the last minute, scramble around and find a chunk of 2x4, cut it to length, send it thru the planer, and presto- the 60 ¨ lateral.  Now there's a really skinny bit of foam to be added between laterals. 
I grabbed the only bottle of Titebond II on the shelf, and kinda prayed it would be enough..  It was - barely.  Spread the glue, slap on the plywood, making sure it covered all sides.  And start popping in crown staples.  Oodles of them.  


And here's the 'finished' bottom of the bottom.  Next update insulation, topping it, and maybe sealing it.  Still working on that trick.


Saturday, January 15, 2022

Twelve miles...

 Well this was not the Saturday I'd hoped for...

Woke up this morning to much colder conditions than I'd expected.  Yesterday, the weather gurus were predicting temps around -1F/-18C.  When I took the dogs out, it was closer to -9F/-22C.  No big deal, but it made digging out the trailer, tarping it, and hooking it up a whole lot more 'fun'.

And with that, I was off to the dump (12mi) - I think I mentioned that I had to clean ~20 years of accumulated 'stuff' out of the garage.  And almost like Alice's Restaurant, when I got there the dump was closed.  OK, the SBK Malcom Street transfer station.  On to St Paul (12mi)... 20 minutes later, my wallet was 60 bucks lighter, my trailer was empty, and I was off to Maplewood (12mi) to pick up plywood.  Forest Products has a nice selection of Baltic Birch - quite reasonable compared to some other places, and it's all awesome product.  I picked up only enough for the floor this trip.  

Mission accomplished, run to the shop (12mi) to drop off the plywood and dimensional wood for the floor.  Found a parking place for it all, said hit to folks I knew, and headed home (yep, 12mi).  

Mail carrier pulled up as I was putting the trailer away with my new wheel adapters.  After dinner tonight, I opened up the package to find that they were 4 lug.  Just not my day... So new adapters are on order, and I'm drowning my irritation in a nice Kalamazoo stout with the Labs sacked out on the couch. Sometimes you just have to go with it.


Stay safe out there.
 

Wednesday, January 12, 2022

And we have light!

This week is trying my patience a bit.  The Amazon partner who made the wheel spacers chose to ship via USPS.  Free shipping is free shipping, but I really hate USPS delivery promptness or rather the lack thereof.  According to tracking, the adapters are still in Anaheim.  Bah.  That said, it's not like I'm going to hook it up and trail it anytime soon, but it would be nice to roll it further out into the shop to work on, and then push it back in the corner when done.  Hot tip - don't try to build a trailer in a suburban garage in Minnesota in January.  Or maybe that's a cold tip...

But on with what *is* getting done.  The lights are done and tested.  I still have to make tube covers for the 2x2 ends, dress the wire bundle to the junction box, _and_ figure out exactly where to mount/bury the j-box on the tongue.  That probably won't get finalized until near the end of the build.  In the meantime, I'll clamp it to a tube somewhere so I can run the intermingled house/chassis wiring for the 3rd brake light and backup lights, the under chassis disco lights, and anything else I can think of.  Speaking of trailer brakes, I am not impressed with the copper clad aluminum wire that comes in trailer wiring 'specials'.  It's not really 14 AWG, it probably won't stand up to much flexing, and in short - if it weren't being buried in the frame, I would not be using it.  I will drag out 14AWG copper stranded for the brakes and any wiring going into the rear deck lid.  

All lit up and no place to go.
All the wire leads up to the right front corner of the frame, and will then route up to the junction box (which will most likely get mounted under the tongue box).  
Total draw with brakes and running lights is 730 mA @ 12.2v.  Helps to have a precision power supply when wiring to test connections before burying all the wiring!


And it looks like this weekend will be a major trip to the lumber yard, with shopping list in hand.  I count 24 sheets of plywood for this build, mostly 5x5 baltic birch.  My big dilemma is trying to decide to buy it all now, figure out where to store it over the next 4 weeks, or buy it in a couple of stages and play lumber price roulette.  Seems like the trend is for prices to increase, so it may be worth buying the whole pile now...


Saturday, January 8, 2022

Lights on, wheels up

 Well, on one side anyway...  

My focus for today was going to be getting the wheels on, and moving the trailer out from wall a little bit.  And I got a good start on it this morning, packed the bearings, assembled the new hubs, and installed the left side wheel adapter.  A couple of notes about Timbren suspensions.  
1.  Check the entire order as soon as you get it.  My suspension was OK, but the boxes with the brakes were both damaged.  One of the grease seals was damaged from banging around in the box in a baggie with the lug nuts and bearings.  
2.  The instructions recommend 50 lb/ft of torque on the backing plate.  Not sure how since most of the bolts are partially/completely obscured.  Had to fake that.
3.  The main mounting bolts and spindle plate bolts require 105 lb/ft.  This means a 1/2 torque wrench.  Not everyone has that laying around, so be aware.
4.  The instructions also say to seat the bearings with 200lb/ft of torque and back off. I'm not an expert, but my sense is that this is a really bad idea.  My best guidance on wheel bearings is that you need only enough pressure to load the bearings and take the play out.  e-trailer has a much more rational set of numbers, and you can probably find 50 YouTube videos on installing trailer bearings. 

I hung the wheel and checked for interference.  Uhh.  Red flag.There's perhaps a 3/32¨ gap between the pivot bolt head and the tire.  Looks like I goofed on the spacer dimension. Got an inch, need 1.5...  That'll add a few day's delay in moving the trailer, but I can keep working on other projects - like the lights and brake wiring - while the wider adapters are on order.  I think the extra spacing will be fine.  If it was >2¨, I would drop back and order the long spindles instead.


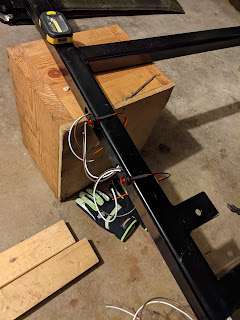
With the suspension about as done as possible, I started working on the wiring, pulling wire through the entire perimeter, and connecting lights.  I'll have another day of hooking up lights if today is any judge.  Great plan going in, execution a little flawed.  I'm glad I got the 200 count butt splices - I wound up re-doing several today.  The lights draw around around 25mA each, so I won't plan to leave the running lights on when parked.  Still, that's considerably less than the equivalent incandescent!!!


Pardon the messy garage.  It's about 50 degrees in the garage (with the heater), and snow outside.  My wife was nice enough to let me move her car out for the day, which adds a bit more room to work.  The marker lights are push-in, while the tails are screw-in.  
The big learning for the day is that there is truly a huge difference between stranded copper, and copper clad aluminum wiring.  i think the aluminum stuff is fine for the lights - it's inside, and won't move around but I'll run pure copper for the brake wiring.  


A tip if you don't work with wiring very much:
You _can_ get away with stripping wire with a utility knife, and crimping with a pair of kitchen pliers, and I've certainly done so in an emergency.  A step up is a crimping tool like sold in kits at the parts store.  They work, but it's not great. 
But if you have a lot of connections to make, and want clean strips, and clean crimps, get good tools.  I have had my strippers (Klein 11063W) for at least 20 years.  The blades are replaceable, and they make perfects strips every time.  
The crimpers are new this job.  My grip strength is not what it was years ago, so I opted for a new pair of Haisstronica insulated connector crimpers.  They work very well.  Also, having some sort of table to keep your tools handy, and that can follow you around the job is a big help.  I should add a piece of cardboard just to keep things from falling through.  (hasn't been an issue, but the next task involves a lot of screws, clamps and drill bits.  I think I'll cut up a dog food box...

Wednesday, January 5, 2022

For lack of a butt splice

 I was hoping to post pics of the wheels installed, the wiring all done, and talk about getting the deck on.  And with a little luck I'll have at least one of the first two done this week.  

I forgot to include the special brackets needed to support the Timbren suspension in my first trip to the sandblaster/powder coater.  And of course they were on a reduced schedule the past couple of weeks, so they didn't get done.  Hopefully tomorrow.  And that's OK, I really wasn't planning to put them on until I got most things wired anyway.

And I was planning to get the all the wiring fished, and the chassis lights installed.  Well, I got partly done.  First, my 25 year old fish tape decided to break into 5 pieces.  Actually there's no telling when that really happened.  I only found it was broken when I tried to extend it and it was jammed.  Opening up 60 feet of tightly coiled spring steel is always entertaining, and usually something best done on a warehouse floor.  Released, it attempts to expand to its full relaxed shape - in one quick explosion.  In any case, I wrapped up the broken parts, saved the 12 foot tip, ordered a new tape, and got to fishing.

I have to admit this was more entertaining than I had hoped.  When I did all the holes for wiring and installation, I only had a 3/4¨ step drill (warning, don't buy the gold Harbor Fright bits.  They are doubtless fine on aluminum, but mild steel - nope).
That's a tight corner, and then there is a hole in the tube wall at the end of the cross tube that was un-fishable.  I stuffed a loop of paracord through and managed to catch it with the end of the fish tape.  Doing this all on a frame that still thinks it's outside in the cold... It took a while.

Eventually, they all got fished, and I realized that I failed to order a stock of butt splices.  Another quick add to my daily Amazon cart, and they will be here on Friday - which is just as well since the high temp here tomorrow is supposed to be -1F/-18C, which means my garage will be struggling to maintain 32/0C.  I'll fire up the torpedo on Friday, and over the weekend.  Hopefully by Monday we have a rollable trailer.


Monday, January 3, 2022

And we're in!

 (inside that is...)

Actually a good milestone today = the trailer frame moved inside!  With a little help from the neighborhood muscle, we got the frame in the garage and on blocks.  It will need to be raised an inch or two to install the wheels, There is still a little snow stuck on the frame from sitting out in the elements for the past week.  Now to hang the suspension, mount the wheels, and install the trailer lighting.  


Hindsight is [almost] always 20/20...

 As I've said before, this trailer has been a very agile project.  There have been more than a few compromises, changes, and adjustments...